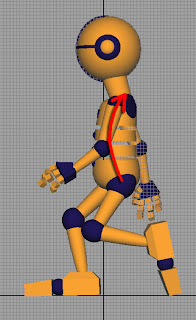
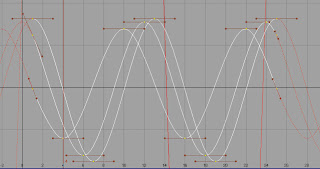
It's now time to add a little forward and backward movement to the upper body as well as adding a little rotation to the hips, back, chest and head. At this stage, we'll also offset the curves in the graph editor for the hips, back, chest and head to begin to create some follow through.
1. Our first and last CONTACT POSITIONS should find our upper body somewhat straight up and down.
2. As our character begins to move fwd, at our 1st DOWN POSITION we should rotate the upper body back slightly to balance the fwd momentum.

3. We offset every curve one frame over except for the center of gravity node. So, the back would be offset one frame over from the COG, the chest one frame over from the back, and the head one frame over from the chest as such:

4. When you shift the animation curves over, you're going to get keys that move out of the desired time frame, wo we use the INSERT KEYS TOOL to insert keys where we need them, and delete the keys that fall outside the time frame [for instance, keys will need to be inserted at frame 1 a lot and at frame 25 and then keys beyond 25 will need to be deleted].
5. After inserting the keys, the graphs need to be adjusted to get nice flowing curves.


1 comment:
Nice animation!
Post a Comment